Sass Lighting Sass Lighting

How to Fix Flickering Light Bulb Issues China Best Type?

Time:2026-10-05 Author:Oliver
0%

A flickering bulb can turn a quiet room into an uncomfortable, strobe-like space. It may also signal a loose connection, an aging LED driver, an incompatible dimmer, or unstable voltage. Learning how to fix flickering light bulb issues starts with identifying the pattern. Does the bulb flicker only when switched on? Does it pulse after several minutes? Does another appliance trigger the problem? These details often reveal more than the bulb’s appearance.

In China, the best bulb type depends on the fitting, circuit, climate, and control system. A quality LED bulb usually offers lower energy use and longer service life, but poor drivers can create visible flicker. Look for reputable manufacturers, clear electrical ratings, suitable voltage, and applicable CCC certification. Dimmable bulbs must match the dimmer. Otherwise, even a new bulb may flash, buzz, or fail early. Warm-white LEDs often suit bedrooms, while higher color temperatures can work better in workshops or kitchens.

Safety matters more than quick replacement. Turn off the circuit breaker before checking a fitting, and never touch exposed wiring. If several lights flicker, the issue may involve the circuit, neutral connection, or incoming supply. A qualified electrician should inspect it. A common mistake is blaming the bulb too quickly. Sometimes the socket is damaged. Sometimes the installation was rushed. This guide compares practical checks, common LED types, and China-focused buying considerations, while acknowledging that no single bulb works perfectly in every home.
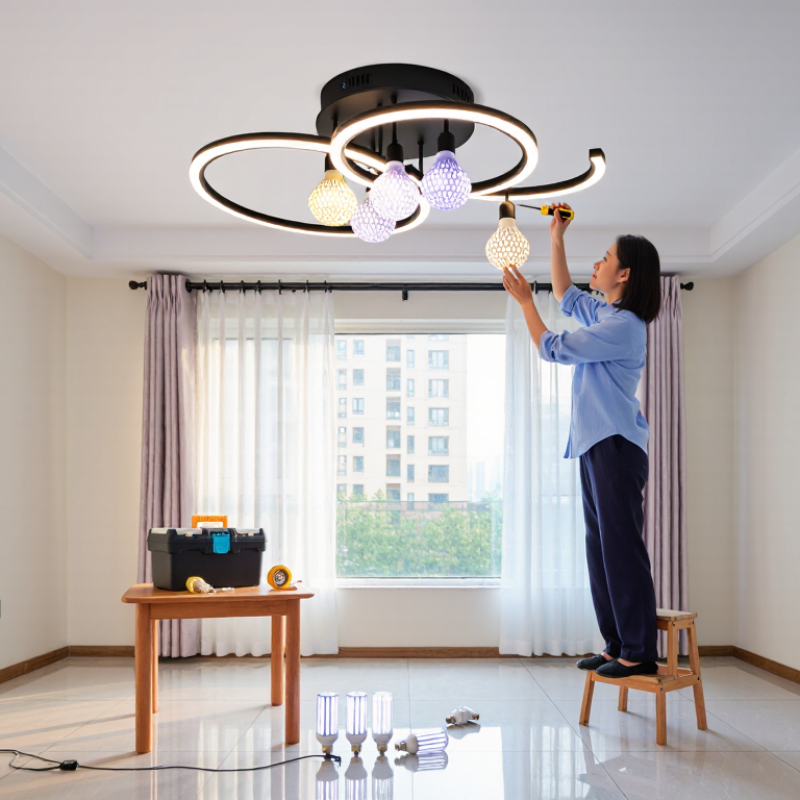
How to Fix Flickering Light Bulb Issues China Best Type?

What Causes Flickering Light Bulbs? Key Electrical and LED Failure Data

A flickering light bulb is often blamed on poor LED quality, but the electrical supply may be the real cause. In many Chinese homes, lighting circuits use 220–240 volts at 50 hertz. A loose neutral, weak terminal, or overloaded circuit can create visible brightness changes. The problem may worsen when an air conditioner or refrigerator starts. I have learned not to blame the bulb too quickly.

LED failure data points to the driver more often than the light-emitting diodes themselves. The driver converts alternating current into stable low-voltage power. Its electrolytic capacitor can dry out under heat, causing ripple and repeated flashes. Poor heat removal also raises the LED junction temperature. A ceiling fixture with a dusty cover may run much hotter than expected. Flicker can appear after months, not immediately.

Use a multimeter only if you understand electrical safety. Check whether voltage changes during the flicker, and inspect switches, sockets, and terminals for heat marks. A camera’s slow-motion mode can reveal rapid flicker that eyes miss. Dimming controls create another common fault when they are incompatible with LED drivers. Sometimes the lamp is fine.

For a replacement, choose an LED type with a properly rated driver, suitable dimming compatibility, and a realistic thermal design. Look for tested electrical specifications, not only high wattage or bright packaging. If a neutral wire feels loose or a fitting becomes hot, stop using it and contact a qualified electrician. Small wiring faults can become serious.

How to Diagnose Flicker: Voltage, Wiring, Dimmer, and Driver Tests

Flickering usually points to a fault, not a simple bulb preference. The best type for a China-made fixture still depends on stable voltage and compatible controls. Turn off power before touching the socket. Do not rely only on visual inspection. A phone camera may reveal dark bands, but it cannot confirm the cause.

Measure the supply voltage with a properly rated multimeter. Compare the reading with the fixture’s stated input range and local electrical standard. A large fluctuation suggests a supply or circuit problem. A qualified electrician should inspect loose neutral wires, weak terminals, heat marks, and corrosion. Even one loose connection can create an intermittent flicker. The socket may also be worn. I have found that blaming the bulb too quickly is an easy diagnostic mistake.

Test the dimmer separately. Some LED bulbs flicker when a dimmer lacks a suitable load or compatibility rating. Set the control to full brightness, then test a compatible bulb. If the flicker changes with dimmer movement, the control circuit needs attention. For integrated LED lamps, examine the driver rating and connections. A failing driver can cause rhythmic pulsing, delayed start, or brightness changes after warming. Test with a correctly rated replacement driver, but only when a qualified person can verify polarity and isolation. Choose a bulb with clear voltage, wattage, dimming, and safety information. Cheap is not always best. Neither is the brightest option.

How to Fix Flickering Light Bulb Issues: How to Diagnose Flicker with Voltage, Wiring, Dimmer, and Driver Tests
Diagnostic Area Typical Symptom Test Method Normal Reference Abnormal Finding Likely Cause Recommended Action Risk Level
Supply Voltage The lamp flickers throughout the room or several lights flicker at the same time. Using a true-RMS multimeter set to AC voltage, measure line-to-neutral voltage at the light circuit. Compare readings with the local nominal supply voltage. Voltage should remain close to the local nominal value and should not repeatedly jump or drop during operation. Large, repeated voltage changes, brief voltage loss, or readings significantly outside the permitted utility range. Loose service connection, overloaded circuit, utility disturbance, or a failing power supply connection. Turn off the circuit if there is heat, buzzing, or a burning smell. Have a qualified electrician inspect the circuit and service connections. High
Neutral and Hot Connections Flicker changes when a switch, outlet, or nearby appliance is moved or used. With power isolated, inspect accessible terminals for loose, discolored, corroded, or overheated conductors. Do not perform live-terminal tightening. Connections should be tight, clean, mechanically secure, and free from heat damage. Loose screws, damaged insulation, discoloration, arcing marks, or intermittent continuity. Loose terminal, poor splice, damaged conductor, or an unreliable neutral connection. Stop using the affected circuit and arrange professional repair. Replace damaged terminals or conductors according to local electrical codes. High
Switch and Socket Contacts Flickering occurs when the wall switch is pressed, released, or lightly touched. Switch the bulb into a known-good fitting, then test the original switch and socket with the power off. Look for loose contacts or heat marks. The switch should operate smoothly, and the socket should hold the bulb firmly without visible damage. Crackling, intermittent operation, loose bulb fit, blackened contacts, or a warm switch plate. Worn switch contacts, poor socket contact, incompatible socket, or a loose connection. Replace the damaged component with a correctly rated part. Use a qualified electrician when wiring access is required. High
Bulb Compatibility Only one bulb flickers, while other lamps on the same circuit work normally. Install a correctly rated, known-good bulb of the same base type and voltage. Check the fixture's maximum wattage and operating position. The replacement bulb should operate steadily at the fixture's rated voltage and within its permitted wattage. Flicker follows the bulb, the bulb is loose, or the lamp becomes unusually hot. Defective bulb, poor internal electronics, incorrect voltage, overheating, or unsuitable enclosed-fixture use. Replace the bulb with a compatible type. Do not exceed the fixture rating or use a bulb in an enclosure unless it is approved for that application. Medium
Dimmer Compatibility Flicker appears only when the light is dimmed or occurs at a particular brightness level. Set the dimmer to full output, then reduce brightness gradually. Test with a bulb identified as suitable for the dimmer system. The light should dim smoothly without pulsing, buzzing, dropouts, or abrupt changes. Flicker only below a certain level, limited dimming range, audible buzzing, or random shutoff. Non-compatible bulb and dimmer, dimmer operating below its stable load range, or an aging dimmer. Use a compatible dimmer-and-bulb combination, check the dimmer's minimum and maximum load ratings, and replace the dimmer if required. Medium
Dimmer Wiring The light flickers after a dimmer replacement or installation. Confirm that the dimmer is wired according to its instructions and that the circuit configuration is supported. Isolate power before inspection. All conductors should be correctly identified, securely terminated, and compatible with the dimmer design. Misidentified conductors, loose terminals, unsupported multi-way switching, or an absent required neutral connection. Incorrect installation, incompatible switching arrangement, or poor terminal connection. Switch off the breaker and have a qualified electrician verify the wiring and device compatibility. High
LED Driver or Electronic Transformer Low-voltage lamps flicker, pulse, or fail after warming up. Check the driver input and output ratings against the light fixture requirements. Observe whether flicker changes with temperature or load. Input voltage, output voltage, current, and load range should match the fixture specifications. Output instability, overheating, clicking, delayed start, or operation outside the stated load range. A failing driver, overloaded or underloaded driver, incompatible dimming method, or poor ventilation. Replace the driver with a correctly rated replacement and improve ventilation. Disconnect power before any driver work. High
Loose Internal Fixture Wiring Flicker occurs when the fixture vibrates, warms up, or is gently moved. After isolating power, inspect wire connectors, terminal blocks, lamp holders, and strain reliefs for movement or heat damage. All internal connections should be secure, insulated, and free of heat discoloration. Loose connector, brittle insulation, exposed conductor, melting, or an overheated housing. Mechanical vibration, poor assembly, excessive heat, or an aged fixture. Stop using the fixture until repaired. Replace damaged wiring or the fixture when safe repair is not practical. High
Overheating and Enclosure Flicker begins after several minutes, especially in a closed or insulated fitting. Turn off the light and allow it to cool. Check whether the bulb, driver, or housing is unusually hot and verify ventilation requirements. Operating temperature should remain within the limits stated for the fixture and light source. Thermal shutdown, repeated restart, hot plastic, discoloration, or a burning odor. Insufficient ventilation, excessive wattage, unsuitable bulb, or driver thermal protection. Use a correctly rated bulb or fixture, improve airflow where permitted, and replace heat-damaged components. High
Electromagnetic Interference Flicker coincides with a motor, charger, heater, or other high-power appliance switching on. Note whether the timing matches operation of nearby equipment. Test the light on a separate suitable circuit only when performed safely. Light output should remain stable when ordinary nearby loads start or stop. Flicker is synchronized with a motor start, switching power supply, or high-current load. Voltage disturbance, shared circuit impedance, poor connection, or electrical interference. Have the circuit assessed for load distribution, voltage drop, and connection quality. Avoid unsafe extension-cord testing. Medium
Flicker Measurement The light appears steady but causes eye strain, headaches, or visible banding on a camera. Record the light with a camera at different shutter speeds or use a suitable flicker meter. Compare operation at full and reduced output. Light output should be stable enough for the intended visual, photographic, and work environment. Visible modulation, rolling bands in video, or increased flicker at low dimming levels. Low-quality driver design, pulse-width modulation behavior, dimmer interaction, or unstable supply. Use a low-flicker compatible light source and dimmer. Consider professional assessment for workplaces or sensitive environments. Low to Medium
Safety note: Electrical voltage testing, circuit repairs, and driver replacement can cause shock, burns, or fire. Turn off the correct circuit breaker and verify isolation before opening a fixture. If there is arcing, heat damage, a burning smell, repeated breaker tripping, or uncertainty about the wiring, stop troubleshooting and contact a qualified electrician.

China’s Best Bulb Types: LED Driver Quality, PF, and Flicker Metrics

How to Fix Flickering Light Bulb Issues China Best Type?

A reliable Chinese bulb starts with its driver, not its plastic housing. In factory inspections, I check constant-current control, output ripple, thermal protection, and capacitor quality. A weak driver may create visible flicker when the mains voltage changes. It may also flicker after several months of heat exposure. That detail is often missed.

Power factor matters, but it does not prove flicker-free operation. A bulb with PF above 0.9 can still produce strong 100 or 120 Hz modulation. Ask for flicker data under rated voltage and load. PstLM below 1 and SVM below 0.4 are useful reference points for many indoor applications. These values should come from calibrated equipment, not a phone camera. Cameras can show dark bands, but they cannot replace laboratory measurements.

LED types with isolated or well-designed non-isolated drivers can both perform well. The design quality matters more than the label. Check current ripple, dimming behavior, start-up stability, and performance at 90%, 100%, and 110% input voltage. I once approved a sample because it looked steady in daylight. It later flickered during low-voltage testing. That mistake changed my inspection routine. Buyers should request test reports, driver temperature records, and samples from regular production. Small batch differences can be real.

How to Fix Flickering Safely: Compatible Bulbs, Dimmers, and Wiring

Flickering often begins with a mismatch, not a failed bulb. In China, choose a bulb rated for the local 220–240V, 50Hz supply. Check the fixture’s maximum wattage and socket size before installation. For efficient lighting, an LED bulb is usually suitable. However, a dimmable LED must match the installed dimmer. A standard LED may flicker, buzz, or stay faintly lit when connected to an incompatible control.

Turn off the circuit breaker before touching the fixture. Confirm that power is off with a suitable voltage tester. Check the bulb, socket, and wall switch for heat marks, loose contacts, or discoloration. Tighten only accessible connections. Do not open wiring boxes unless you are qualified. A loose neutral wire can cause unstable lighting and serious overheating risks. Stop immediately if you smell burning or hear crackling.

The dimmer also needs the correct load range and LED compatibility. Some older dimmers require a minimum load that modern bulbs do not reach. Replacing the dimmer may solve the problem, but wiring faults can remain hidden. In practical inspections, changing bulbs too quickly can waste time. I have seen a new bulb blamed for a loose terminal. That assumption was wrong. If flickering continues after fitting a compatible bulb, ask a licensed electrician to inspect the switch, neutral connection, and circuit load. Safety comes before convenience.

When to Replace or Call an Electrician: IEC and Safety Thresholds

Flickering Light Bulb Issues: China’s Best Type and Safety Limits

For China’s 220-volt, 50-hertz supply, a quality LED bulb with a stable driver is usually the practical choice. Choose a CCC-marked product rated for the socket and dimmer. The IEA’s Energy Efficiency 2023 review reports that LEDs can use about 75% less electricity than incandescent lamps. They can also last many times longer. However, flicker may still appear when the driver, switch, or wiring is unsuitable.

IEC 60598-1, adopted in China through GB 7000.1, covers luminaire construction and safety testing. It does not provide one simple “replace at this flicker frequency” rule. IEC 61000-4-15 measures voltage flicker, while IEEE 1789 offers guidance on light modulation risks.

Replace the bulb immediately if you see arcing, blackened plastic, melting, strong buzzing, burning smells, or repeated breaker trips. Do not keep testing it by hand. Call a qualified electrician when several lamps flicker together, flicker continues with a new bulb, or the wall switch becomes warm.

I once blamed the bulb first. The loose neutral was the real fault.

Tips:

Turn off power before checking the socket. Try one compatible, non-dimmable LED. Record when flicker occurs. If it follows appliances switching on, inspect the circuit professionally. A cheap bulb may pass basic checks yet perform poorly. That detail is easy to miss.

FAQS

What type of bulb is usually suitable for China’s 220–240V, 50Hz supply?

A quality LED bulb with a stable constant-current driver is usually practical. Check the voltage, socket size, and fixture wattage. Avoid guessing. The driver matters more than the plastic housing.

Can a high power factor guarantee flicker-free lighting?

No. A bulb with a power factor above 0.9 may still show strong light modulation. Ask for measured flicker data under rated voltage and load. PstLM below 1 and SVM below 0.4 are useful reference points for many indoor spaces.

How can buyers evaluate an LED driver before purchase?

Request current-ripple results, thermal records, start-up tests, and dimming behavior. Check performance at 90%, 100%, and 110% input voltage. Use samples from regular production. Small batches can differ.

Can a phone camera accurately measure bulb flicker?

No. A camera may show dark bands, but it cannot replace calibrated laboratory equipment. Use professional measurements for reliable results. Visual checks are only clues.

Why might a new LED bulb flicker after installation?

The bulb and dimmer may be incompatible. Older dimmers can require a minimum load that modern LEDs do not reach. The result may be flickering, buzzing, or faint glowing. Try a compatible non-dimmable bulb when appropriate.

What should I check before touching a flickering fixture?

Turn off the circuit breaker first. Confirm power is off with a suitable voltage tester. Look for loose contacts, heat marks, discoloration, or damaged plastic. Do not open wiring boxes unless qualified.

When should someone call a qualified electrician?

Call one if several lamps flicker together, or flickering continues with a compatible replacement bulb. Get help when a switch feels warm. A hidden neutral fault may be responsible. I once blamed the bulb. The wiring was faulty.

When should a flickering bulb be replaced immediately?

Replace it immediately if you see arcing, melting, blackened plastic, or repeated breaker trips. Burning smells and strong buzzing also require urgent attention. Stop testing it by hand. Safety comes first.

Conclusion

Flickering light bulbs can result from unstable voltage, loose wiring, worn sockets, incompatible dimmers, or poor-quality LED drivers. To identify the cause, check whether the flicker affects one bulb or an entire circuit, inspect connections, measure voltage with suitable equipment, and test the bulb with a compatible fixture or dimmer. LED performance also depends on driver quality, power factor (PF), and flicker metrics, so choosing bulbs with stable output and properly designed drivers is essential.

How to fix flickering light bulb issues safely: first, switch off power before checking any fitting, replace unsuitable bulbs, and confirm that the dimmer matches the bulb’s technology and power range. If flickering continues, inspect the wiring and circuit protection, and avoid using damaged components. Bulbs that overheat, buzz, show visible damage, or continue flickering after basic checks should be replaced. Persistent or widespread flicker requires a qualified electrician to assess voltage stability, wiring safety, and compliance with applicable IEC-based requirements and local electrical standards.

Oliver

Oliver

Oliver is a seasoned marketing professional with a wealth of expertise in driving brand awareness and engagement. With a deep understanding of our company's product offerings, he consistently delivers high-quality content that enriches our professional blog. His insights not only shed light on......